


Soccer-DIY for the World Cup (with template)
Do you love parties and do you love decorating your home during the World Championship? Well, then this soccer diy out of paper is for you. It is easy to fold and it's original measurements make it a fun decor.
After each game you should let you friends sign on it. Cool memory, don't you think?
Soccer DIY - How to
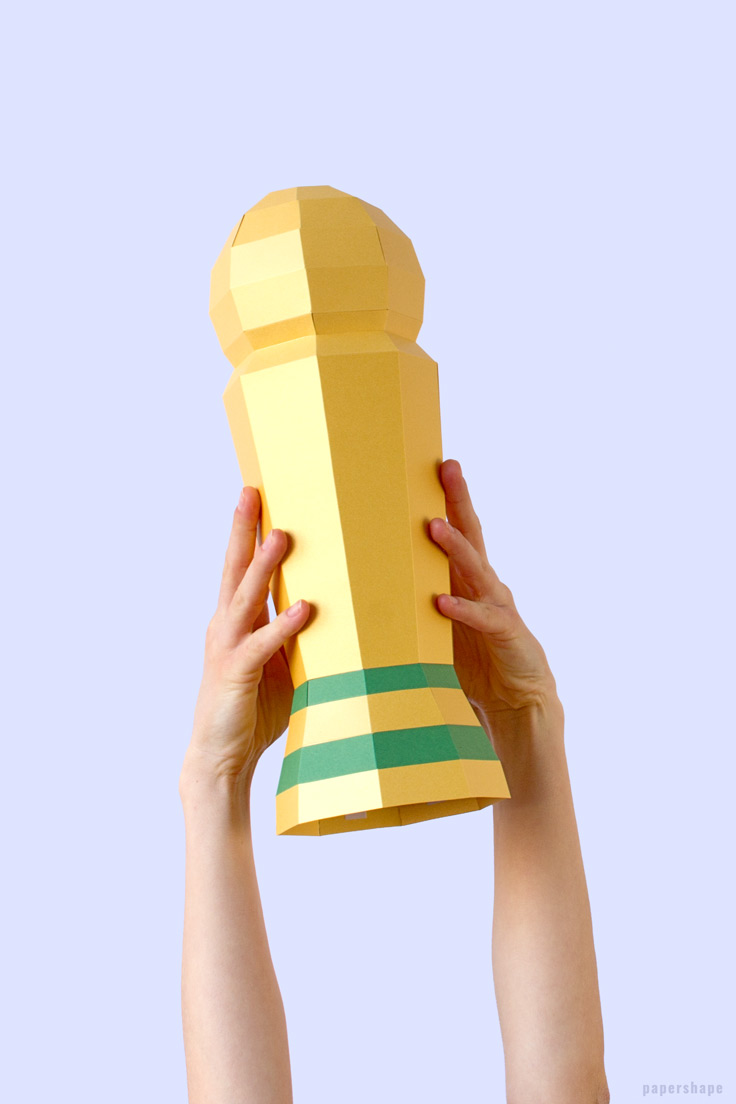
Lift up this soccer diy either with one or with two hands. It's light weight makes it super easy to carry it around.

Girls, we run the world :) Personally, I don't like the gold and green colors. Thats why I papercrafted my own girly version of it.
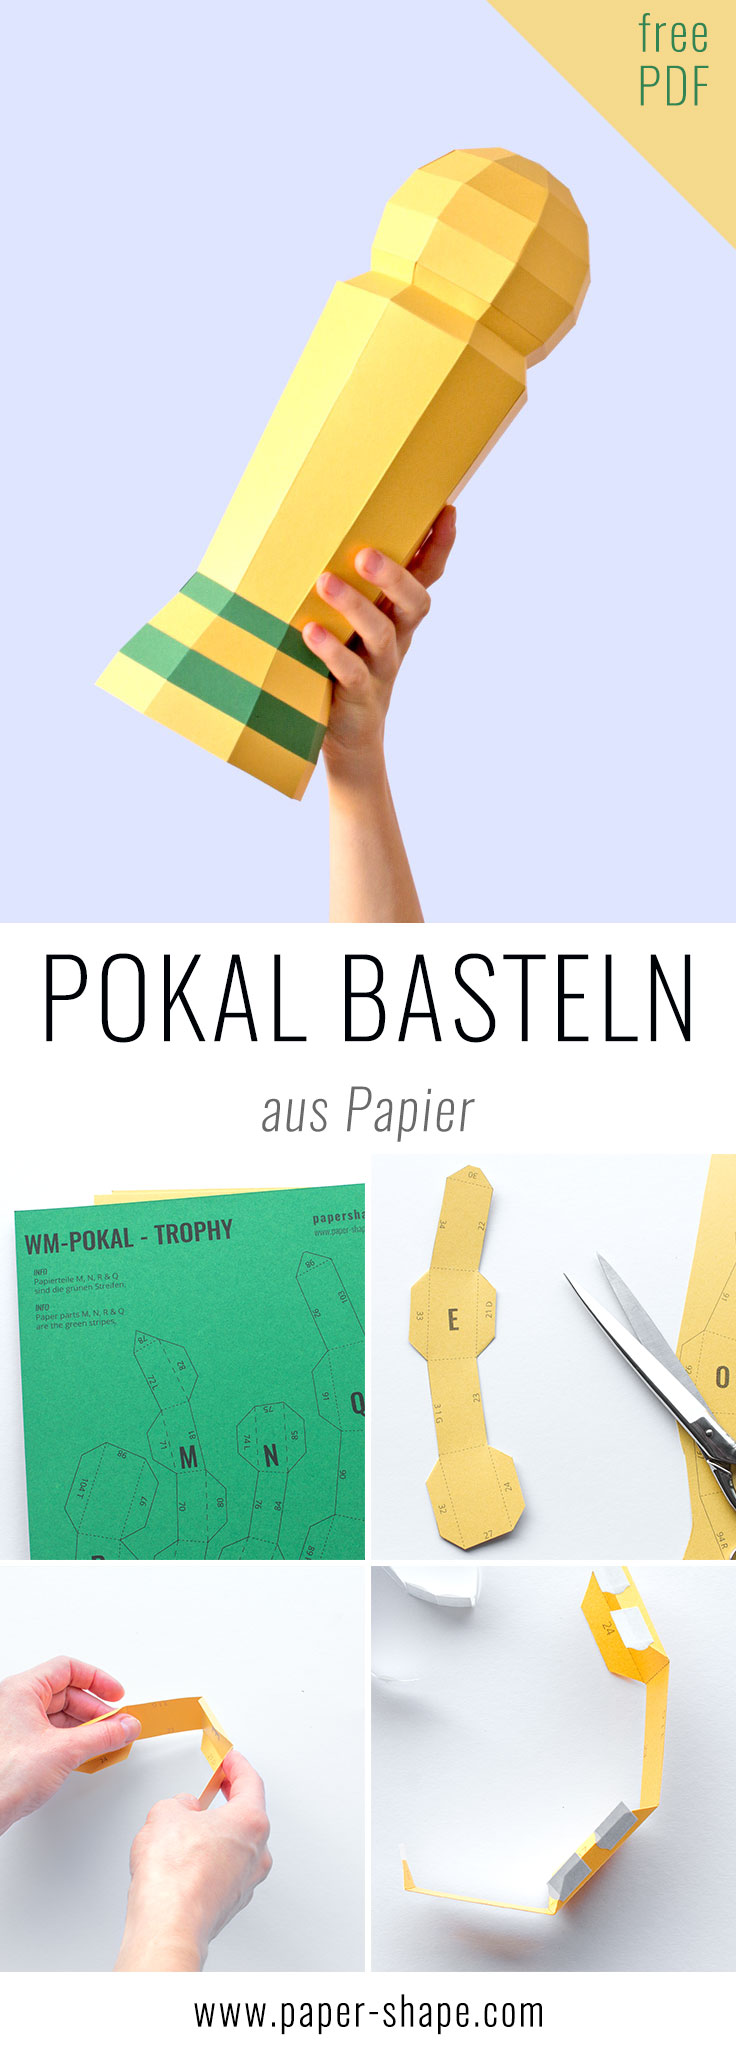
3 step tutorial for your soccer diy
Materials needed
- 6 cardstock paper (8.5in x 11in) (weight: 65lb-110lb / 176gsm-300gsm)
- Glue or double-sided tape
- Scissors
- Ruler
- Bonefolder / awl / ball pen refill etc.
- Cutting mat

1. Print the template (US letter or DIN A4) on paper of your choice. You'll need 6 sheets of paper (5 in gold and 1 in green if you wish to craft this soccer-diy in it's "realisitic look". Each printer should easily print cardstock up to 230gsm (80lb).
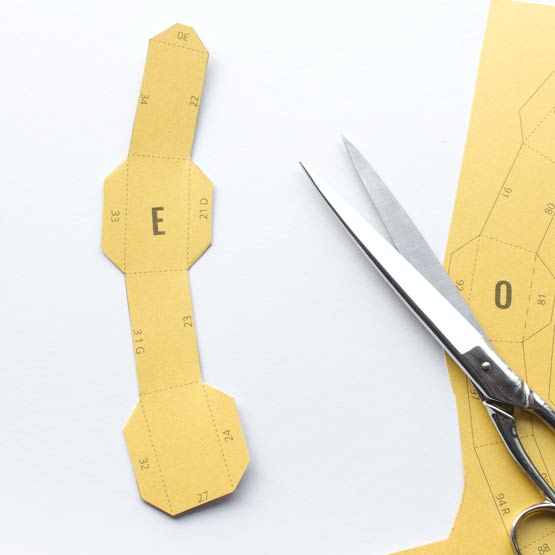
2. Cut out the paper parts (A, B, C, ...) by cutting along the solid lines.
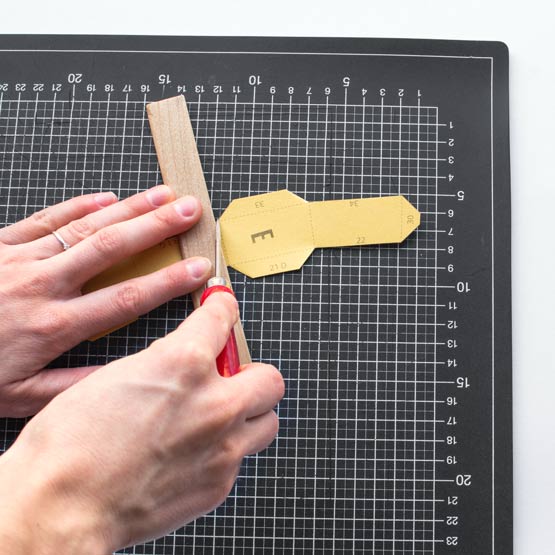
3. Place a ruler on the dotted lines and mark the folds by pressing down hard and running a bonefolder or an awl along the lines.
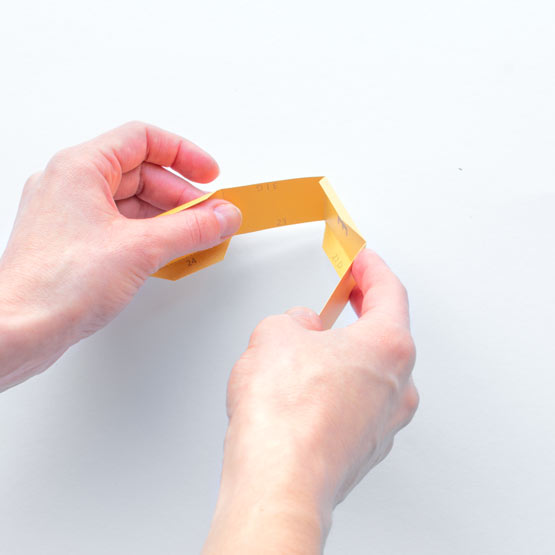
4. Start with the paper piece A and place it in front of you. The printed side should be facing you. Subsequently fold all the dotted lines either inwards, which means to fold up (short dotted lines) or outwards, which means to fold down (long dotted lines), according to the markings.
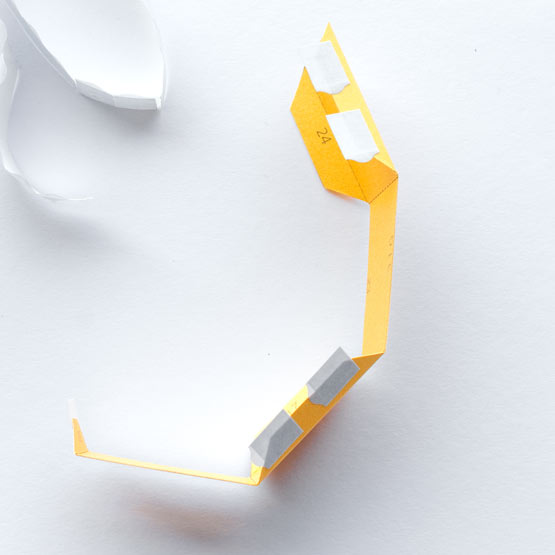
5. Use double-sided tape or any glue onto the unprinted side of the tabs.Each number exists twice. Stick all the same numbers together in ascending order (1, 2, 3, ...). Start with section 1 and stick it to the section marked 1 on paper A, pressing firmly enough to make them stick together.